Today I will talk about technique that is new to me, but I watched few tutorials, and decided to give it a try. This is one of those things that really anyone can do, without any special tools. All you need is nail polishes, disposable cup and silicone mat or cookie sheet or piece of parchment paper, or just a plastic bag. I was told that photo speaks thousand words, so let me start with a quick slideshow.
Some of you may think that this was pretty wasteful, but owning on the plus side of 1500 polishes, I thought this a brilliant way to use up some of those older polishes, so I could give myself excuse to purchase some more... not that I needed excuse.
I used following polishes: Sally Hansen: Disco Ball, Lemon Zest, Crushed and Grape Idea, Sinful Colors: Folly and 24/7.
I used this for my toe nails, and because I have ugliest toes this side of the universe, there is no way that I will show you this manicure. I will just tell you that looks great! I will definitively experiment more with this technique in the future. Best thing is that every time you will get different results, every time you will create something unique!
I liked this one, but found colors to be too close, and I am a drama queen, and wanted something more dramatic...
I decided to use again those two Sinful colors - Folly (dark pink) and 24/7 (neon pink), but decided to have some more contrast. I added Revlon - Chroma Chameleon (purple to green duochrome) and Sassy (lime green).
This combo was more up to my alley, except that you could see precious little of the neon pink! Ah well, you can't win them all.
I loved this so much, that I did not let even a tiny bit to waste, and I managed to do manicure on all of my nails. This is how this looked.
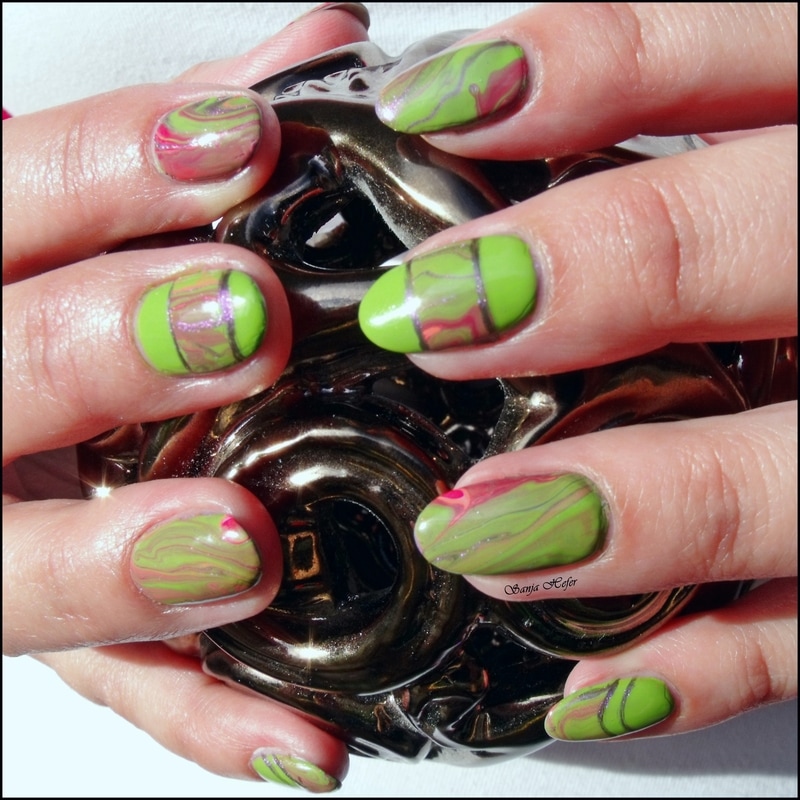
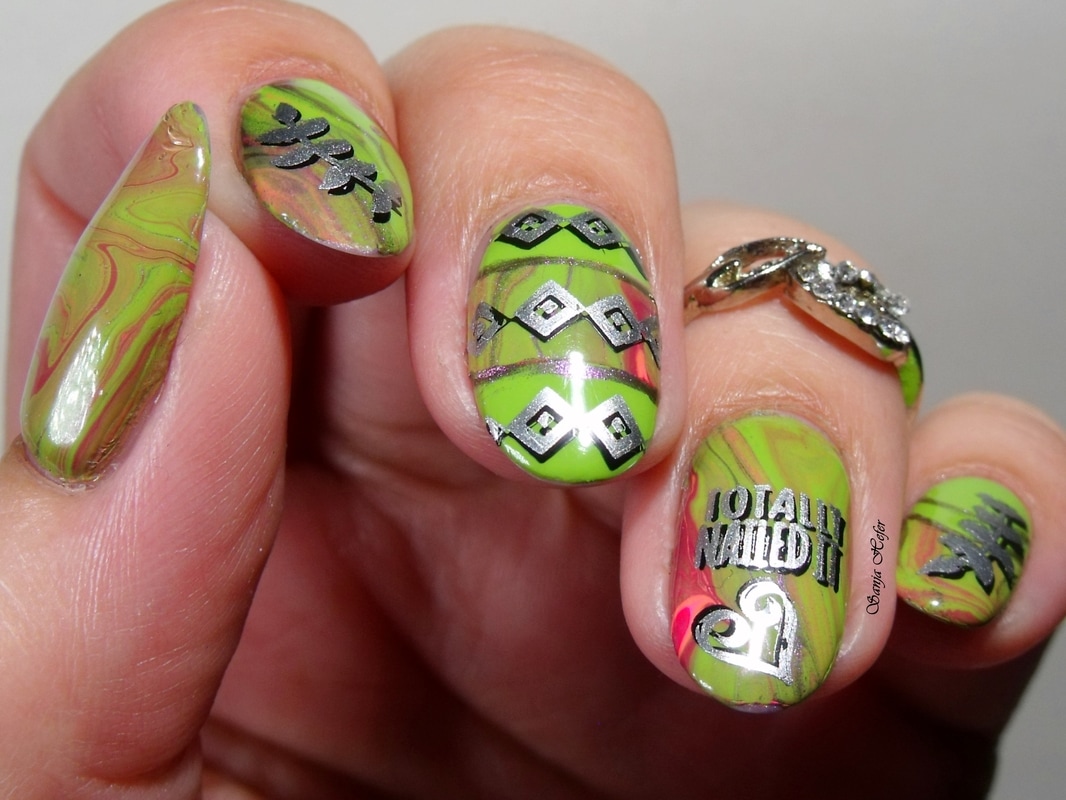
I roped one of my sons to take a photo of both of my hands, and this was the best from the batch... focusing was not on his agenda...
As you can tell, Revlon - Sassy took over here, and I just added some more on my middle and pinky.
With this technique, after your marble is completely dry, you peel it off of the mat, and just cut the pieces that would be enough to cover full nails. You can really play here. You can do full nail coverage, or you can do partial- like I did on my middle and pinky. I just wanted to show some of the things you can do with this. Your imagination is your only limitation. You can also use punch hole cutters - fancy ones, to cut out of the shapes, then you apply them to the nail.
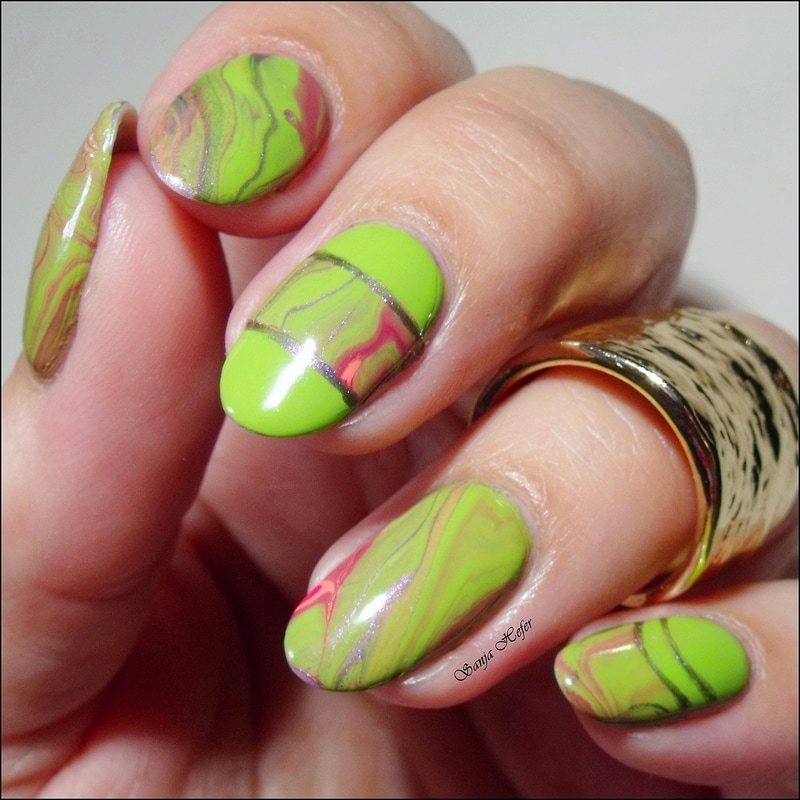
Application was fairy simple. For full nail application, I used sticky base coat - in my case I used Yellow Stopper, and gently pressed dry piece of decal onto my nail. I cut around as much as I could, then using the brush dipped in acetone, I cleaned excess around the nails. If you do not have a sticky base coat, there is no problem. You can use a regular top coat, or as I did on pinky and middle finger - just a coat of nail polish. Just wait for a few moments, and place your decal on the top while polish was still tacky, but wait until dry to clean up around the nail.
I also used the fine brush to add some stripes on the edges of the decal, but you can leave it as is- which ever is your preference.
I applied top coat, and this was done!
As you can tell, Revlon - Sassy took over here, and I just added some more on my middle and pinky.
With this technique, after your marble is completely dry, you peel it off of the mat, and just cut the pieces that would be enough to cover full nails. You can really play here. You can do full nail coverage, or you can do partial- like I did on my middle and pinky. I just wanted to show some of the things you can do with this. Your imagination is your only limitation. You can also use punch hole cutters - fancy ones, to cut out of the shapes, then you apply them to the nail.
Application was fairy simple. For full nail application, I used sticky base coat - in my case I used Yellow Stopper, and gently pressed dry piece of decal onto my nail. I cut around as much as I could, then using the brush dipped in acetone, I cleaned excess around the nails. If you do not have a sticky base coat, there is no problem. You can use a regular top coat, or as I did on pinky and middle finger - just a coat of nail polish. Just wait for a few moments, and place your decal on the top while polish was still tacky, but wait until dry to clean up around the nail.
I also used the fine brush to add some stripes on the edges of the decal, but you can leave it as is- which ever is your preference.
I applied top coat, and this was done!
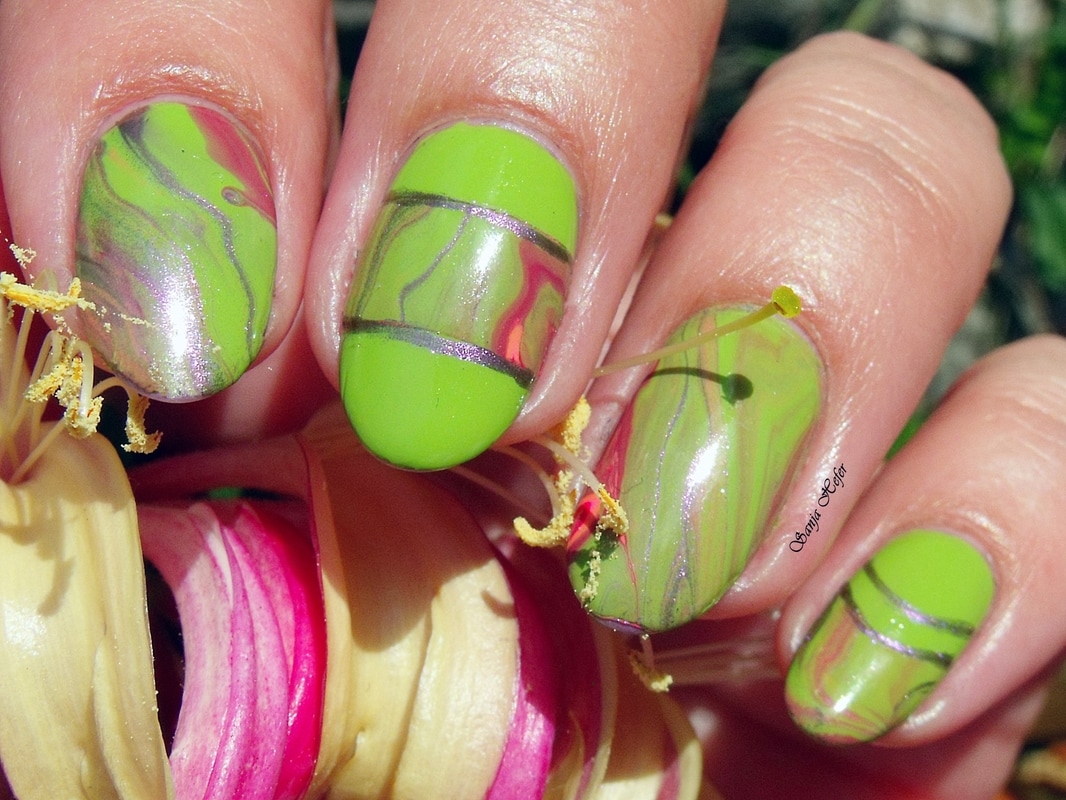
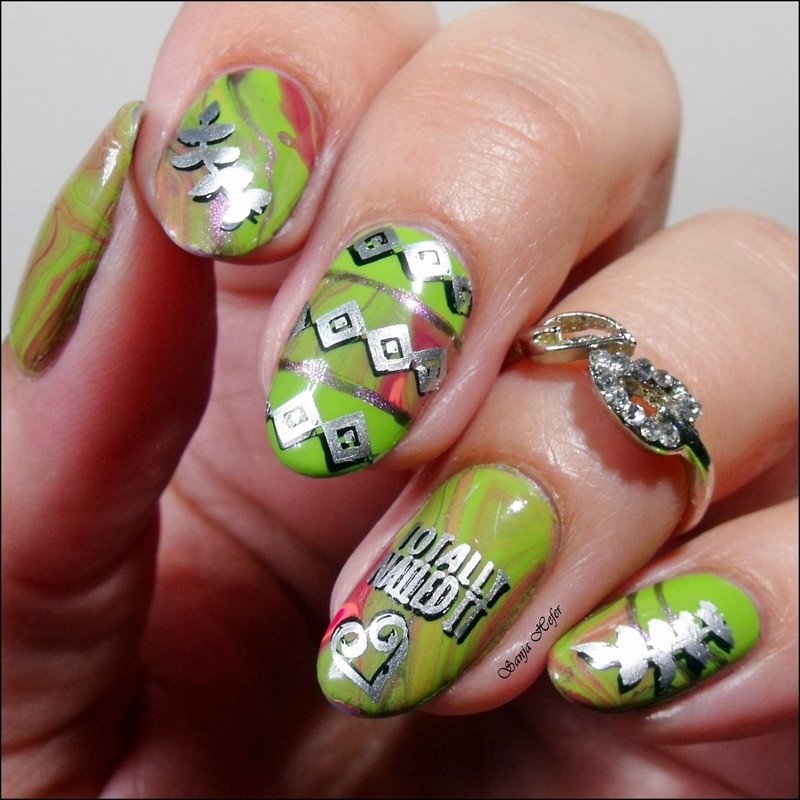
Hehehe - I had to play with it little bit more...
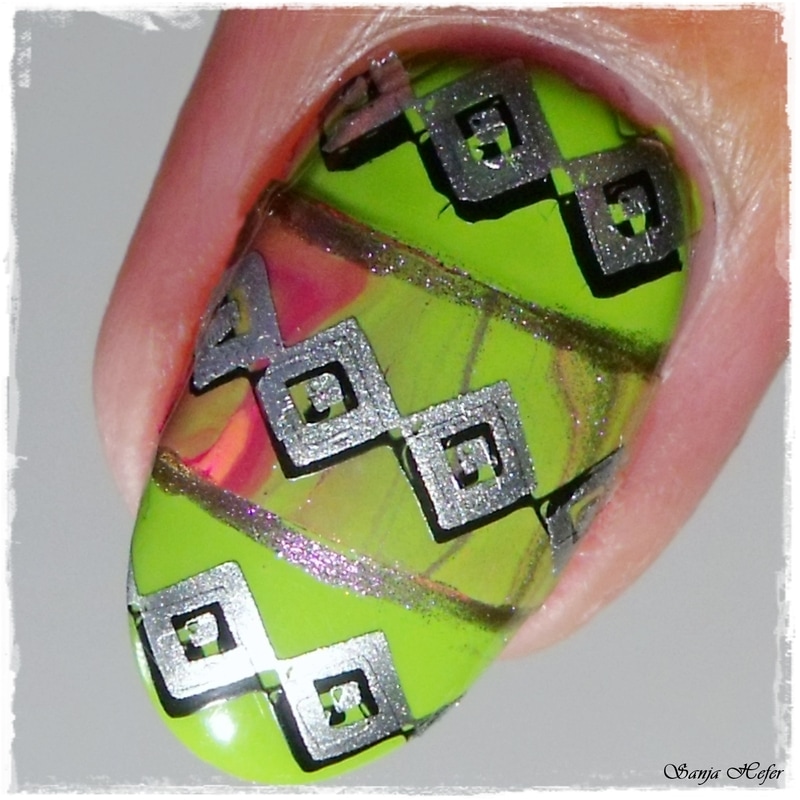
I added some shadow stamping - of course - that is something I do a lot lately...
Images are on UR Beautiful 01, and I stamped with Hit the Bottle - As Black as Night, and then with Winstonia - Silver bullet. All of that was possible with the use of clear jelly stamper. I was also happy that I could use that phrase on my ring finger!
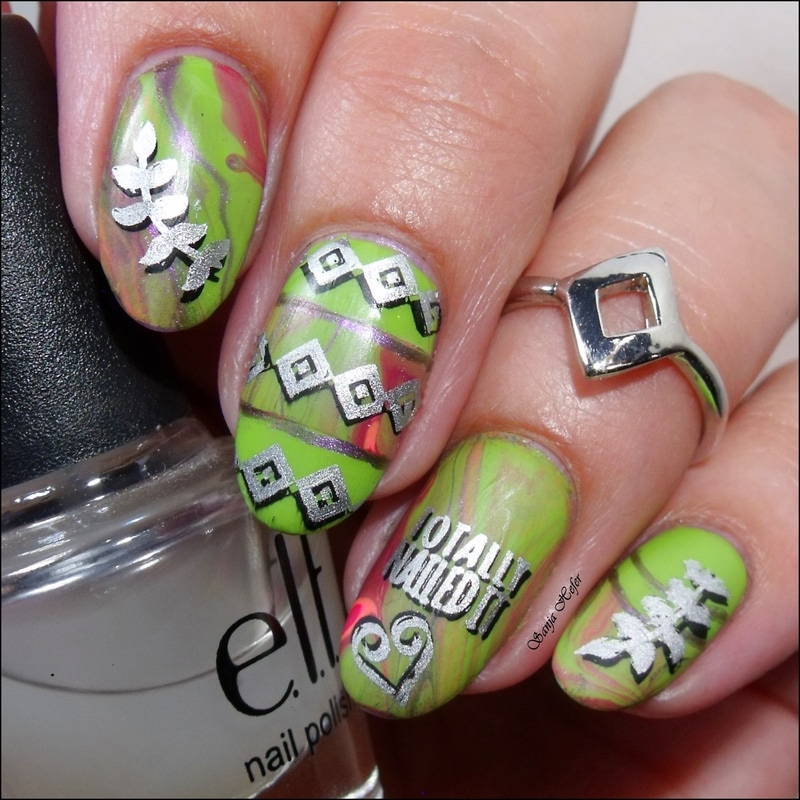
I have some glossy photos, but I also have few with matte finish, and this time I used ELF - Matte Finisher.
Have yourself a bright and happy day.
Cheers!
I added some shadow stamping - of course - that is something I do a lot lately...
Images are on UR Beautiful 01, and I stamped with Hit the Bottle - As Black as Night, and then with Winstonia - Silver bullet. All of that was possible with the use of clear jelly stamper. I was also happy that I could use that phrase on my ring finger!
I have some glossy photos, but I also have few with matte finish, and this time I used ELF - Matte Finisher.
Have yourself a bright and happy day.
Cheers!