Here is the item I was most excited abut from my review parcel Vivian from Born Pretty Store sent me. I am talking about item #37676, color choice GRB 20. That is 3 Pc. set consisting of Born Pretty black nail polish, Chameleon glitter mirror powder and Top coat.
I will talk about each item separately, as I used them.
While doing this manicure, I honestly took about 150 photos, and yet was not able to capture all of this goodness. That is the reasoning behind all of the slideshows I will show you today... I narrowed it down to whatever you can see, but was still bit much for posting individual photos of it.
I started with Black nail polish BPR 007, and if you are interested, each item in this set is sold separately! Black polish is item #35984.
I have several black polishes, and there is the difference between them. Lets get something straight, you can never have too many black (or white) polishes for that matter.
Again, I want to talk to you about brush. Two thumbs up for Born Pretty Store for switching to wide, flat brush. I absolutely love it! Polish itself, applies smoothly and self levels well.
On the swatch above, I am wearing one coat, no top coat! You gotta love that!
Considering how well it applied, I tried stamping with it. Guess what - It stamps! I will show you how well it stamps in my last review...
As I said, I do not always show you what I do in exact order... so this time only, I will not show you the swatch... you will have to wait for the full manicure.
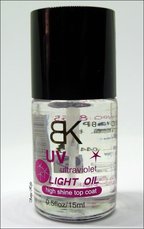
Next item in the set is top coat, and if you want to purchase it separately, look for item #32802. I told you that I did not know how to use it because instructions were on language I am not able to read... and to be honest, I was bit confused with the name on it - UV ultraviolet light oil ...
I did played with it, and I am happy to report that this is like your regular top coat. You apply it on the nails, and it will air dry, fairly quick to a glass like surface. Kind of like a gel top coat, very smooth and shiny, and ready for the powder to be rubbed in.
So this you can use as a base for the powder, but also to top it off.
I took photos of the final manicure with and without top coat, to see the difference.
I will just move on to the next item, because that is what I used next...
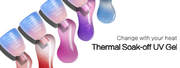
Last item I used is Chameleon mirror powder, and it is also sold separately, item #37596, color GRB 20, just like in the set..
I applied the powder with the eyeshadow applicator that was provided in the packaging. I noticed with the powders that is best to apply them by always doing the strokes in the same direction (kind of like applying the polish), so I applied it from the bottom of my nail towards the tip.
OMG!!! This powder is a-mah-zing!!!
Color wise, it has shift from rich, emerald green, over teal to violet and plum. My favourite colors in wonderful transition - I just wanted to look at my nails all day.
Again, I want to talk to you about brush. Two thumbs up for Born Pretty Store for switching to wide, flat brush. I absolutely love it! Polish itself, applies smoothly and self levels well.
On the swatch above, I am wearing one coat, no top coat! You gotta love that!
Considering how well it applied, I tried stamping with it. Guess what - It stamps! I will show you how well it stamps in my last review...
As I said, I do not always show you what I do in exact order... so this time only, I will not show you the swatch... you will have to wait for the full manicure.
Next item in the set is top coat, and if you want to purchase it separately, look for item #32802. I told you that I did not know how to use it because instructions were on language I am not able to read... and to be honest, I was bit confused with the name on it - UV ultraviolet light oil ...
I did played with it, and I am happy to report that this is like your regular top coat. You apply it on the nails, and it will air dry, fairly quick to a glass like surface. Kind of like a gel top coat, very smooth and shiny, and ready for the powder to be rubbed in.
So this you can use as a base for the powder, but also to top it off.
I took photos of the final manicure with and without top coat, to see the difference.
I will just move on to the next item, because that is what I used next...
Last item I used is Chameleon mirror powder, and it is also sold separately, item #37596, color GRB 20, just like in the set..
I applied the powder with the eyeshadow applicator that was provided in the packaging. I noticed with the powders that is best to apply them by always doing the strokes in the same direction (kind of like applying the polish), so I applied it from the bottom of my nail towards the tip.
OMG!!! This powder is a-mah-zing!!!
Color wise, it has shift from rich, emerald green, over teal to violet and plum. My favourite colors in wonderful transition - I just wanted to look at my nails all day.
No matter how hard I tried, I could not capture all the beauty of it. I did not apply top coat on the swatches above.
In that little box is 1 gram of this magical powder, but no worries, little goes long way, and really, I would barely touch the powder, and applied amazingly.
I would apply with one side of the applicator, and wipe excess with the other side - but you can also use cosmetic sponge to wipe excess powder off of the top of the nail for a smooth finish. With a soft brush, I just brushed off any powder that fell into crease at the edges of the nail.
On above photos, I did not even do a clean up, I just wanted to take photos of it...
I also did not use any latex protection. I did use it with the first one, but I have sensitivity to latex, so I skip it any time I can. I am telling you that because I wanted you to know that you do not need speed to apply it, slow and steady strokes are just fine, and honestly, clean up was minimal.
Even though site recommend this one over the black base, I am really curious how it would look over the different colors. That is something I need to play with in the future, as I am really strapped for time at the moment...
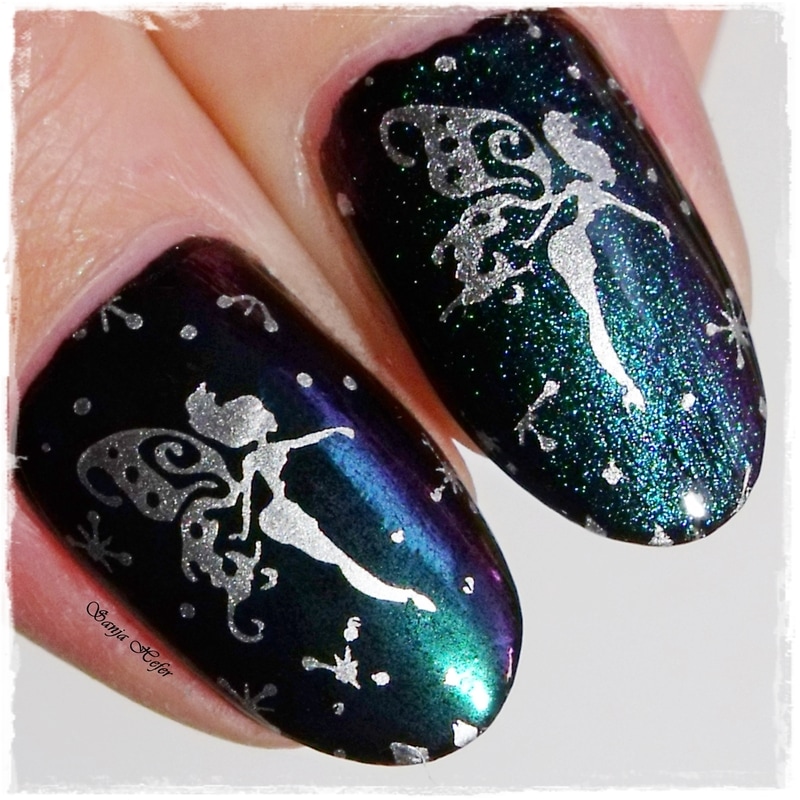
Of course I did not leave this alone, and I did some magical nail art. Do you believe in magic? Well, I do!
So over this magical powder, I stamped some magical fairies!
I did minimal,simple stamping that would not take away from this beautiful base, but enhance it.
I stamped with Winstonia - Silver Bullet, and Clear Jelly Stamper, using images from MoYou London - Fairytale collection 01 stamping plate.
In that little box is 1 gram of this magical powder, but no worries, little goes long way, and really, I would barely touch the powder, and applied amazingly.
I would apply with one side of the applicator, and wipe excess with the other side - but you can also use cosmetic sponge to wipe excess powder off of the top of the nail for a smooth finish. With a soft brush, I just brushed off any powder that fell into crease at the edges of the nail.
On above photos, I did not even do a clean up, I just wanted to take photos of it...
I also did not use any latex protection. I did use it with the first one, but I have sensitivity to latex, so I skip it any time I can. I am telling you that because I wanted you to know that you do not need speed to apply it, slow and steady strokes are just fine, and honestly, clean up was minimal.
Even though site recommend this one over the black base, I am really curious how it would look over the different colors. That is something I need to play with in the future, as I am really strapped for time at the moment...
Of course I did not leave this alone, and I did some magical nail art. Do you believe in magic? Well, I do!
So over this magical powder, I stamped some magical fairies!
I did minimal,simple stamping that would not take away from this beautiful base, but enhance it.
I stamped with Winstonia - Silver Bullet, and Clear Jelly Stamper, using images from MoYou London - Fairytale collection 01 stamping plate.
All the photos above are taken without top coat. I did promised to show you comparison photo of manicure with and without top coat.
I am wearing this for three days straight, and love it, but to be able to wear it to work, I did both of my hands.
I am showing you my thumbs side by side, and thank you my son for taking the photo for me, as it was mission impossible for me to hold the camera and take the photos of my thumbs...
I am wearing this for three days straight, and love it, but to be able to wear it to work, I did both of my hands.
I am showing you my thumbs side by side, and thank you my son for taking the photo for me, as it was mission impossible for me to hold the camera and take the photos of my thumbs...
Thumb on the left is without top coat, while i applied it on the nail on the right side...
Honestly, if I was sure that this would last me so long, I would skip the top coat all together. No top coat, will give you that real chrome finish and I just adore the mirror finish - I had to be really creative when taking the photos, as I did not want you to see mine reflection in it.
Top coated one is looking more like multichrome polish than a mirror powder, even though I found color to be more brilliant, regardless the more 'grainy' look.
And single photo for the finish...
I went outside for a walk with Princess (my precious four legged girl), and I noticed that this powder was truly chameleon!
All photos you've seen so far were taken under my lamp, and is very deep and saturated, and I just wanted to dive in...
Outside, on daylight, this seemed to be much lighter in color...

Lighter in color, but gorgeous never the less!
Would I recommend this set? YES!
It is so nice to find the products of this kind that you can apply over regular polish, and still have amazing results. To top it off, you are getting great value for a really great deal.
To get 10% off of any full priced item store wide, use my discount code SHGK31.
*** Some of the items used were sent to me for my honest review. All opinion is mine, based on my use and experience with product. For availability and pricing, please refer to seller, all links provided.