Here and then I get inspired to try something new.
I didn't do many drag marble manicures, as a matter of fact, I tried it only once before.
This idea is in my head for a while now, and I am doing first version of it. Both versions include some type of marbling, and I started with dry or drag marble.
In a nutshell, you are making decals, and you can do it on number of surfaces - plastic bag, parchment paper, stamper head or nail art mat. There are mats around there made for nail art with interesting features (latest released few days ago have built in collapsible cup- how cool is that), but I could not justified spending too much money on that, when I could go into Dollar Store and purchase silicone baking sheet and use with same results... That is reason behind having red mat. Silicon mats (of any kind) are really great way to keep your polishing area protected. There is no need of using polish remover to clean it from drips of polish or acrylic paints, as you can remove it with a piece of tape. Any tape. You won't ruin your table finishing (like some of us) with nail polish remover- unintentionally of course...
I will also reveal some useful hacks I came across - mostly by accident rather than by intent. Maybe some of you already use them, but I never seen them in any video tutorials I watched (trust me, I watched more than my fair share)...
Let me start. I started this by taking photos, but I eventually forgot to photograph every step...
For all its worth, I at least have first few steps.
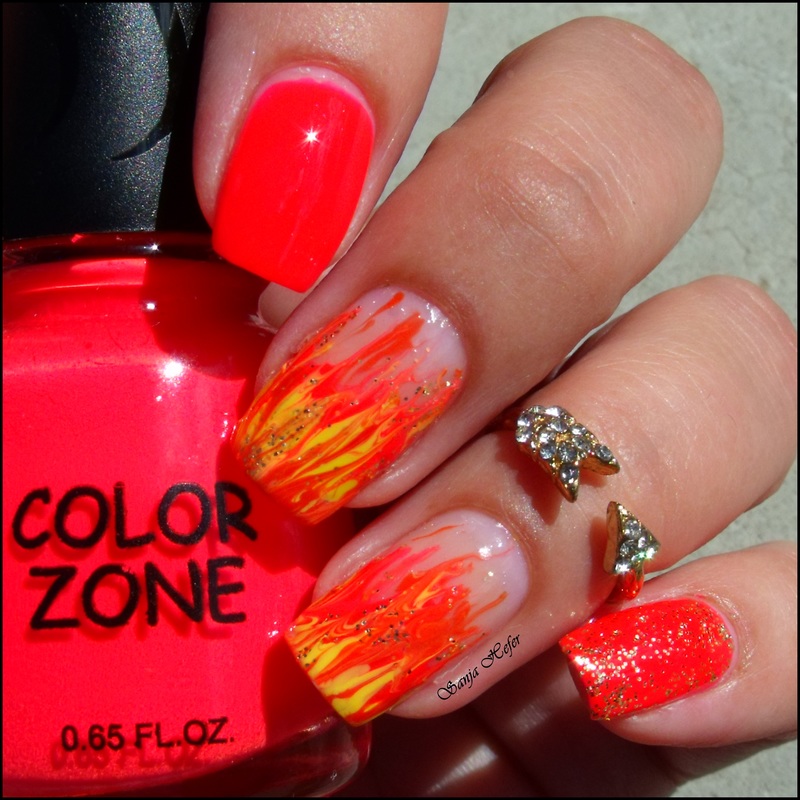
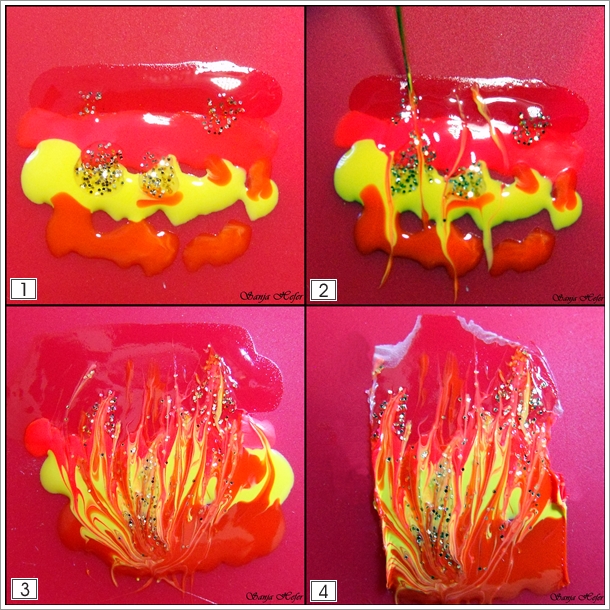
- Photo 1. I drew uneven lines on my mat, and I started with regular top coat, followed with no name orange/pink neon Color Zone polish, followed by Finger Paints - Yellow out man and Ciate - Hopscotch. I also drizzled some L'Oréal - The true gold top coat. There is no need to try to be neat, and I preferred some messiness at this point.
- I used striping brush to drew through the polish, and 'drag' it up and down, working it until satisfied.
- when happy with the look of it, let this to dry.
- When dried, I actually use knife (exacto knife or scalpel) to cut the decal. This is my first hack. I just dislike clean up process, and if I can help it, I try to make as little mess as possible. I noticed that lots of nail artist use some kind of latex barrier, but being sensitive to latex, I am trying to use it only when necessary. I also don't care about rubbing nail polish remover as my hands are already pretty dry from hand sanitizer I use at work way too much... This is the reasoning behind cutting the decal to be as close to the size of my nail as possible. I always use the blade, and so far, this did not mark my mat. I am not sure how would this work with original nail art mats... I found this much better than trying to cut them with the scissors - for some reason they would always stick to the blades, and I would end up with mess...
- To clean around decal, I use your regular painters (masking) tape. This is my best friend when I do my nails. I use it for more than one purpose. I clean my mat, remove unwanted parts of the stamping image off of the stamper head, to remove majority of stamping polish off of my cuticles, pick up spilled glitter for easy clean up. What I love about it is that you do not need scissors to get a little piece of the tape, just rip it with your hands. I know that there are tape dispensers available, but they also take room, and I may not be most graceful person you know. I am bound to cut myself on that serrated blade - it happened to me few times when wrapping presents...
- Here is another use for this tape, and another hack. I am famous for not having the patience to wait long enough for decals to dry, so I would stretch them, or rip them, or they would fold onto themselves... you got the idea, and positioning was always issue, as those are kind of flimsy, and would just 'fell' down where I did not want, and would stick there... Here is my little trick with the tape. I actually leave long enough piece on the bottom of the decal, to which I attach little piece of tape. This allows me to evenly peel decal off of the stamper or mat, and gives it little bit of rigidity at the edge, that allows me better control of it. this way, my fingers or nails on the other hand, never touch the decal, and I do not accidentally stuck it where does not belong.
- After positioning decal on the nail, I just press it down with my fingers, and clean around with brush dipped in nail polish remover. As a base for this manicure (and pretty much all of my manicures) I used Yellow stopper by American Standard. This is sticky base coat, so there was no problem with adhering it to my nail. You can also use it over the polish to create sticky base for decals.
- Topped with top coat. Other nails got polished with two coats of Color Zone polish, and over this on my pinky I added layer of L'Oréal - The true gold.
As you can tell, I started step by step, but I got side tracked. I was recording video tutorial for my Instagream page, and I guess, picture taking took second place...
I will try to do something similar soon, but I will need to use my nonexistent water marbling skills... we will discuss this when I actually put this idea into works.
This is the end of this very long post...
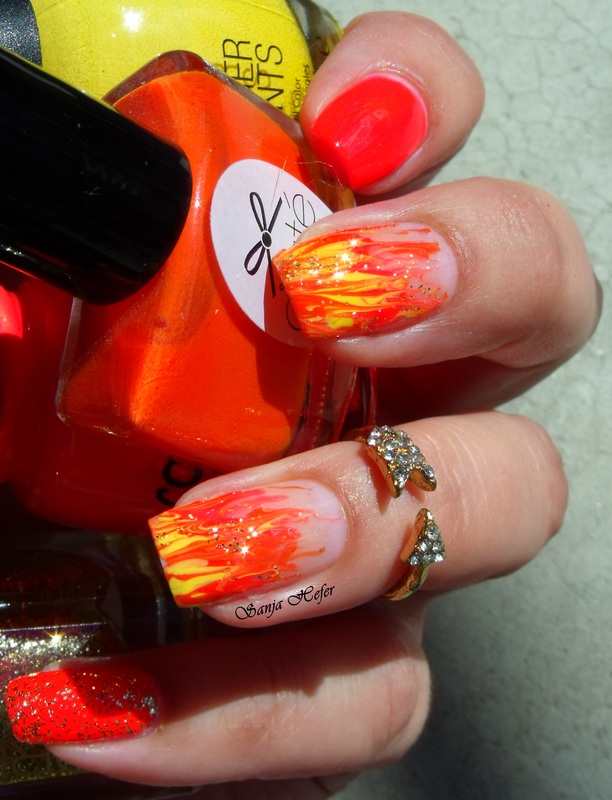
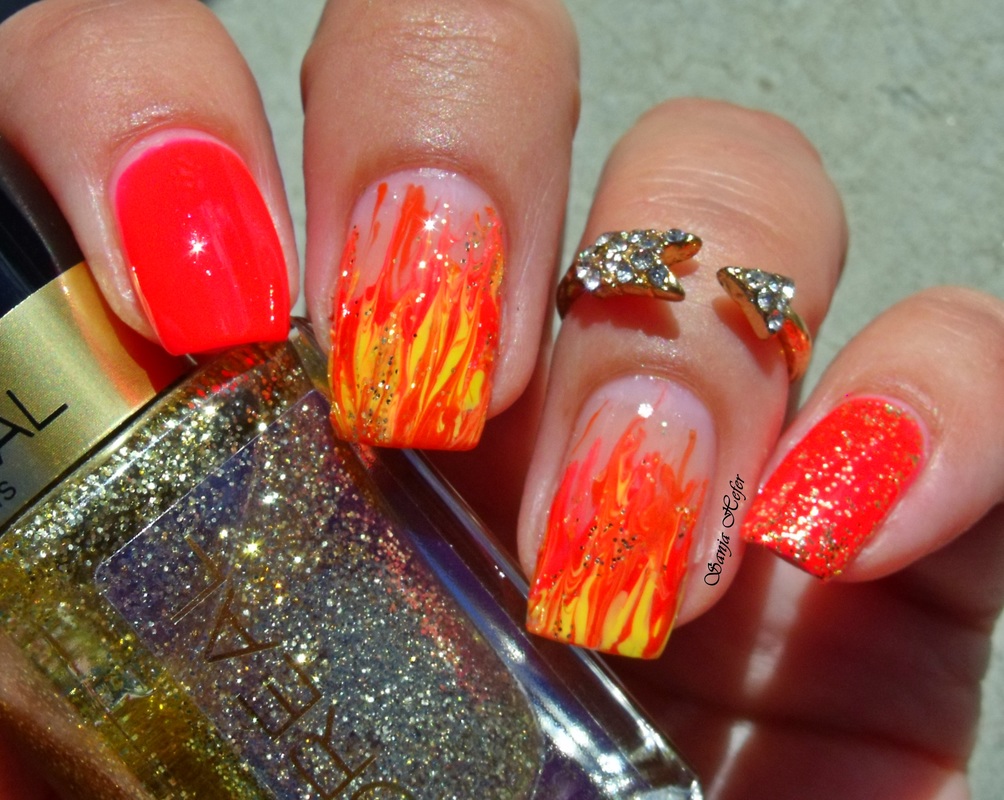
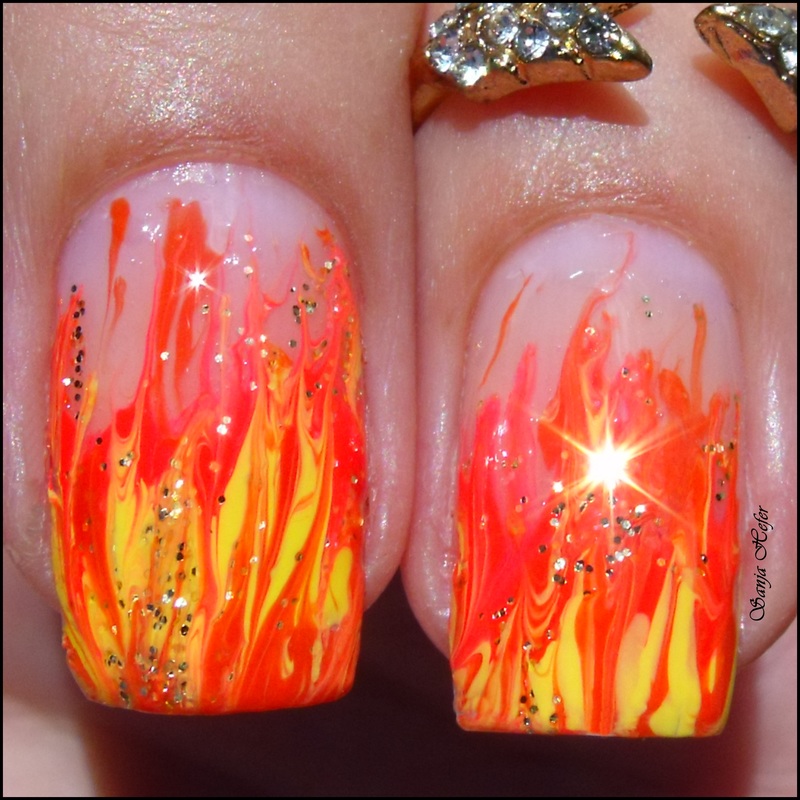
Here are some really bright and fiery photos... I like how this glitter looks like sparks off of the fire...
I think only thing missing here are roasting marshmallows, and I resisted urge of painting them over...
I will try to do something similar soon, but I will need to use my nonexistent water marbling skills... we will discuss this when I actually put this idea into works.
This is the end of this very long post...
Here are some really bright and fiery photos... I like how this glitter looks like sparks off of the fire...
I think only thing missing here are roasting marshmallows, and I resisted urge of painting them over...